Image Block
Short url: https://ewp.guide/go/be/image-block
The Image Block allows you to add an image to your content. After inserting the Image Block, click the Upload button to upload an image to your media library or click the Media Library button to show your media library and select an existing file that you've uploaded previously. Alternatively, click the Insert from URL button to enter the URL of the image you would like to display. You can also drag ’n drop your image onto the Image Block and it will be automatically uploaded to the Media Library and inserted into the Block.
You can add a link to the image using the Insert Link icon (![]() ) on the Block toolbar. You can link the image to the media file itself, link to the WordPress attachment page for that file, or enter in a custom URL for the link using the provided edit field.
) on the Block toolbar. You can link the image to the media file itself, link to the WordPress attachment page for that file, or enter in a custom URL for the link using the provided edit field.
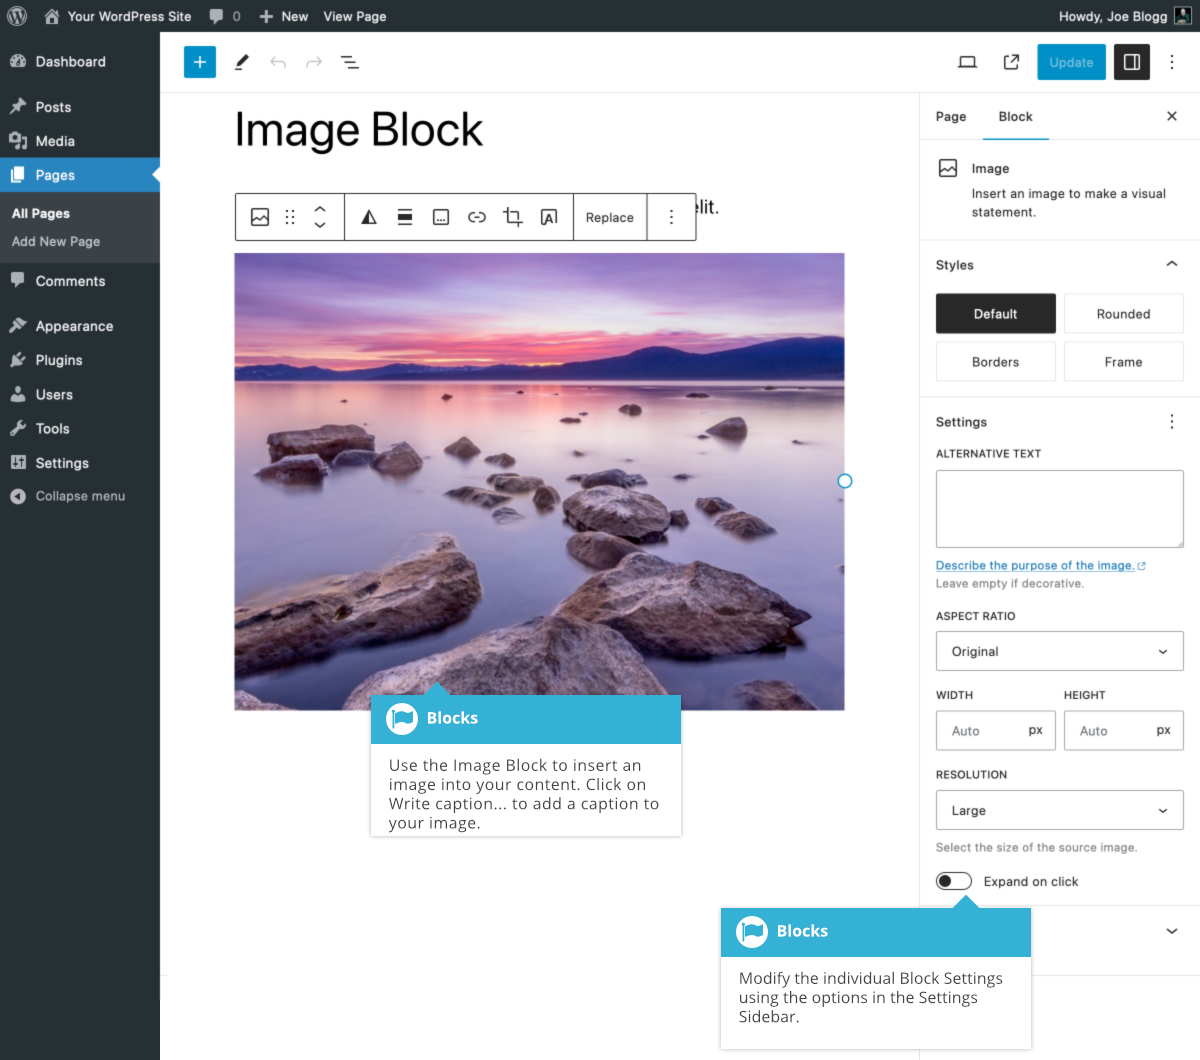
Once you've added your image to your block, there are further options available in the Settings Sidebar.
Alternative Text can be added to your image using the Alt Text field. You can also select a style for your image. Your image will display with square corners by default, but you can also show your image with a rounded mask by selecting the Rounded style.
If you want to change the size of your image, there are a number of ways to do it. You can use the Width and Height fields to set the exact pixel width of your image, or you can use the percentage buttons (e.g. 25%, 50%, 75%, 100%) to change the width accordingly. Alternatively, you can also select the size from the Image size dropdown field. The default WordPress image sizes are available to select (e.g. Thumbnail, Medium, Large or Full Size), and depending on your theme, you may also have other sizes available to you as well.
You can also change the size of the image using the drag handles on the image itself, within the block. Simply position your cursor over one of the blue dots that appears on the edge of the image and then click and drag the image to the size that you want.
When resizing your images, it's always best to only reduce the size, and not enlarge. If you add a small image to your block, and then increase the size, the image will become pixelated and wont appear crisp when viewing your page.
Clicking the Expand on click switch will display the image in a Lightbox popup when someone clicks the image. If you have a link on your image, such as a link to another page within your site or just another site altogether, the Expand on click switch wont be available. The Expand on click switch only works if you don’t have a link on your image.
To display a text caption below your image, click in the Add caption section just below the image and type in your caption.
Basic image editing is also available by clicking the Crop icon (![]() ) on the Block Toolbar. After clicking Crop, you’re provided with three extra icons that allow you to zoom into your image, change the aspect ratio and rotate the image. After making any of these changes, click the Apply button to apply your changes or the Cancel button to cancel the changes.
) on the Block Toolbar. After clicking Crop, you’re provided with three extra icons that allow you to zoom into your image, change the aspect ratio and rotate the image. After making any of these changes, click the Apply button to apply your changes or the Cancel button to cancel the changes.
To add text over the top of your image, click the Add text over image icon (![]() ) on the Block Toolbar. Your Image Block will be transformed into a Cover Block, which allows you to add text over top of the image. If you decide you no longer want text over your image, you can remove the Paragraph block that was inserted over the top of your image, but the block itself, will remain a Cover Block. If you want to go back to your original Image Block, you’ll need to use the Transform icon to transform the Cover Block back into an Image Block.
) on the Block Toolbar. Your Image Block will be transformed into a Cover Block, which allows you to add text over top of the image. If you decide you no longer want text over your image, you can remove the Paragraph block that was inserted over the top of your image, but the block itself, will remain a Cover Block. If you want to go back to your original Image Block, you’ll need to use the Transform icon to transform the Cover Block back into an Image Block.
Clicking the Apply duotone filter icon (![]() ) allows you to add a coloured filter over the top of your image. Duotone filters affect the shadows and highlights of your image and work best on high-contrast images.
) allows you to add a coloured filter over the top of your image. Duotone filters affect the shadows and highlights of your image and work best on high-contrast images.